You’ve probably heard that loose lips sink ships. But did you know that loose shoelaces are just as dangerous? There’s an old military saying that if one soldier trips over his improperly tied shoelaces and falls, another soldier will have to step in and help him, disregarding his duties, and compromising the entire unit. While this saying usually aims to show that everyone must be properly trained, it does apply to the actual case of shoelaces. Everyone should know how to lace military boots, be they a soldier or not.
We’ll show you how to lace military boots, but we’ll also toss in a little something extra. There’s much to know about different ways to lace boots, how to tie military boots, and the benefits for your feet and ankles. Read on to find out everything you ever needed to know about lacing a trusty pair of sturdy military boots.
Why Lacing Techniques Matter
While the method of lacing that you decide on can have an impact on your overall appearance, it’s by far one of the least important concerns you should have.
The reason why you should learn how to lace military boots like a pro is because of all the real benefits you can get. You can achieve better functionality of the boots you wear, make them more comfortable, or lace them in such a way to get more support for your feet and ankles.
Someone who has wide feet could use the eyelets closer to the ankle while leaving the eyelets near the toes empty. That’s where the feet are the widest and where they need the most room to breathe.
On the other hand, a person with high arches might want to try gap lacing so as to make extra room for the top of their feet. There’s more than one way to learn how to lace military boots.
As you can see, there are actual reasons why proper lacing is important. And boots allow for much stronger and more detailed lacing given their size. But how do the military boots compare and why do you need to know how to lace military boots specifically?
The Most Popular Method for Lacing Military Boots


If you’ve ever seen a pair of trusty military boots, you know you have a variety of options and patterns available when it comes to lacing them. You can do quite a bit with military boots as each method brings different advantages — get more support, make your pair of boots even more practical for rough outside terrain, or just go for the militant look. It’s up to you.
Before we can even talk about how to lace military boots, you need a strong, sturdy pair of shoelaces. There’s no point in learning all the practical lacing methods if you’re just going to get the cheapest shoelaces that will wear and tear in a matter of weeks. Start by getting resilient shoelaces that won’t go out so fast. Don’t forget you’ll also need longer shoelaces than what you would otherwise use.
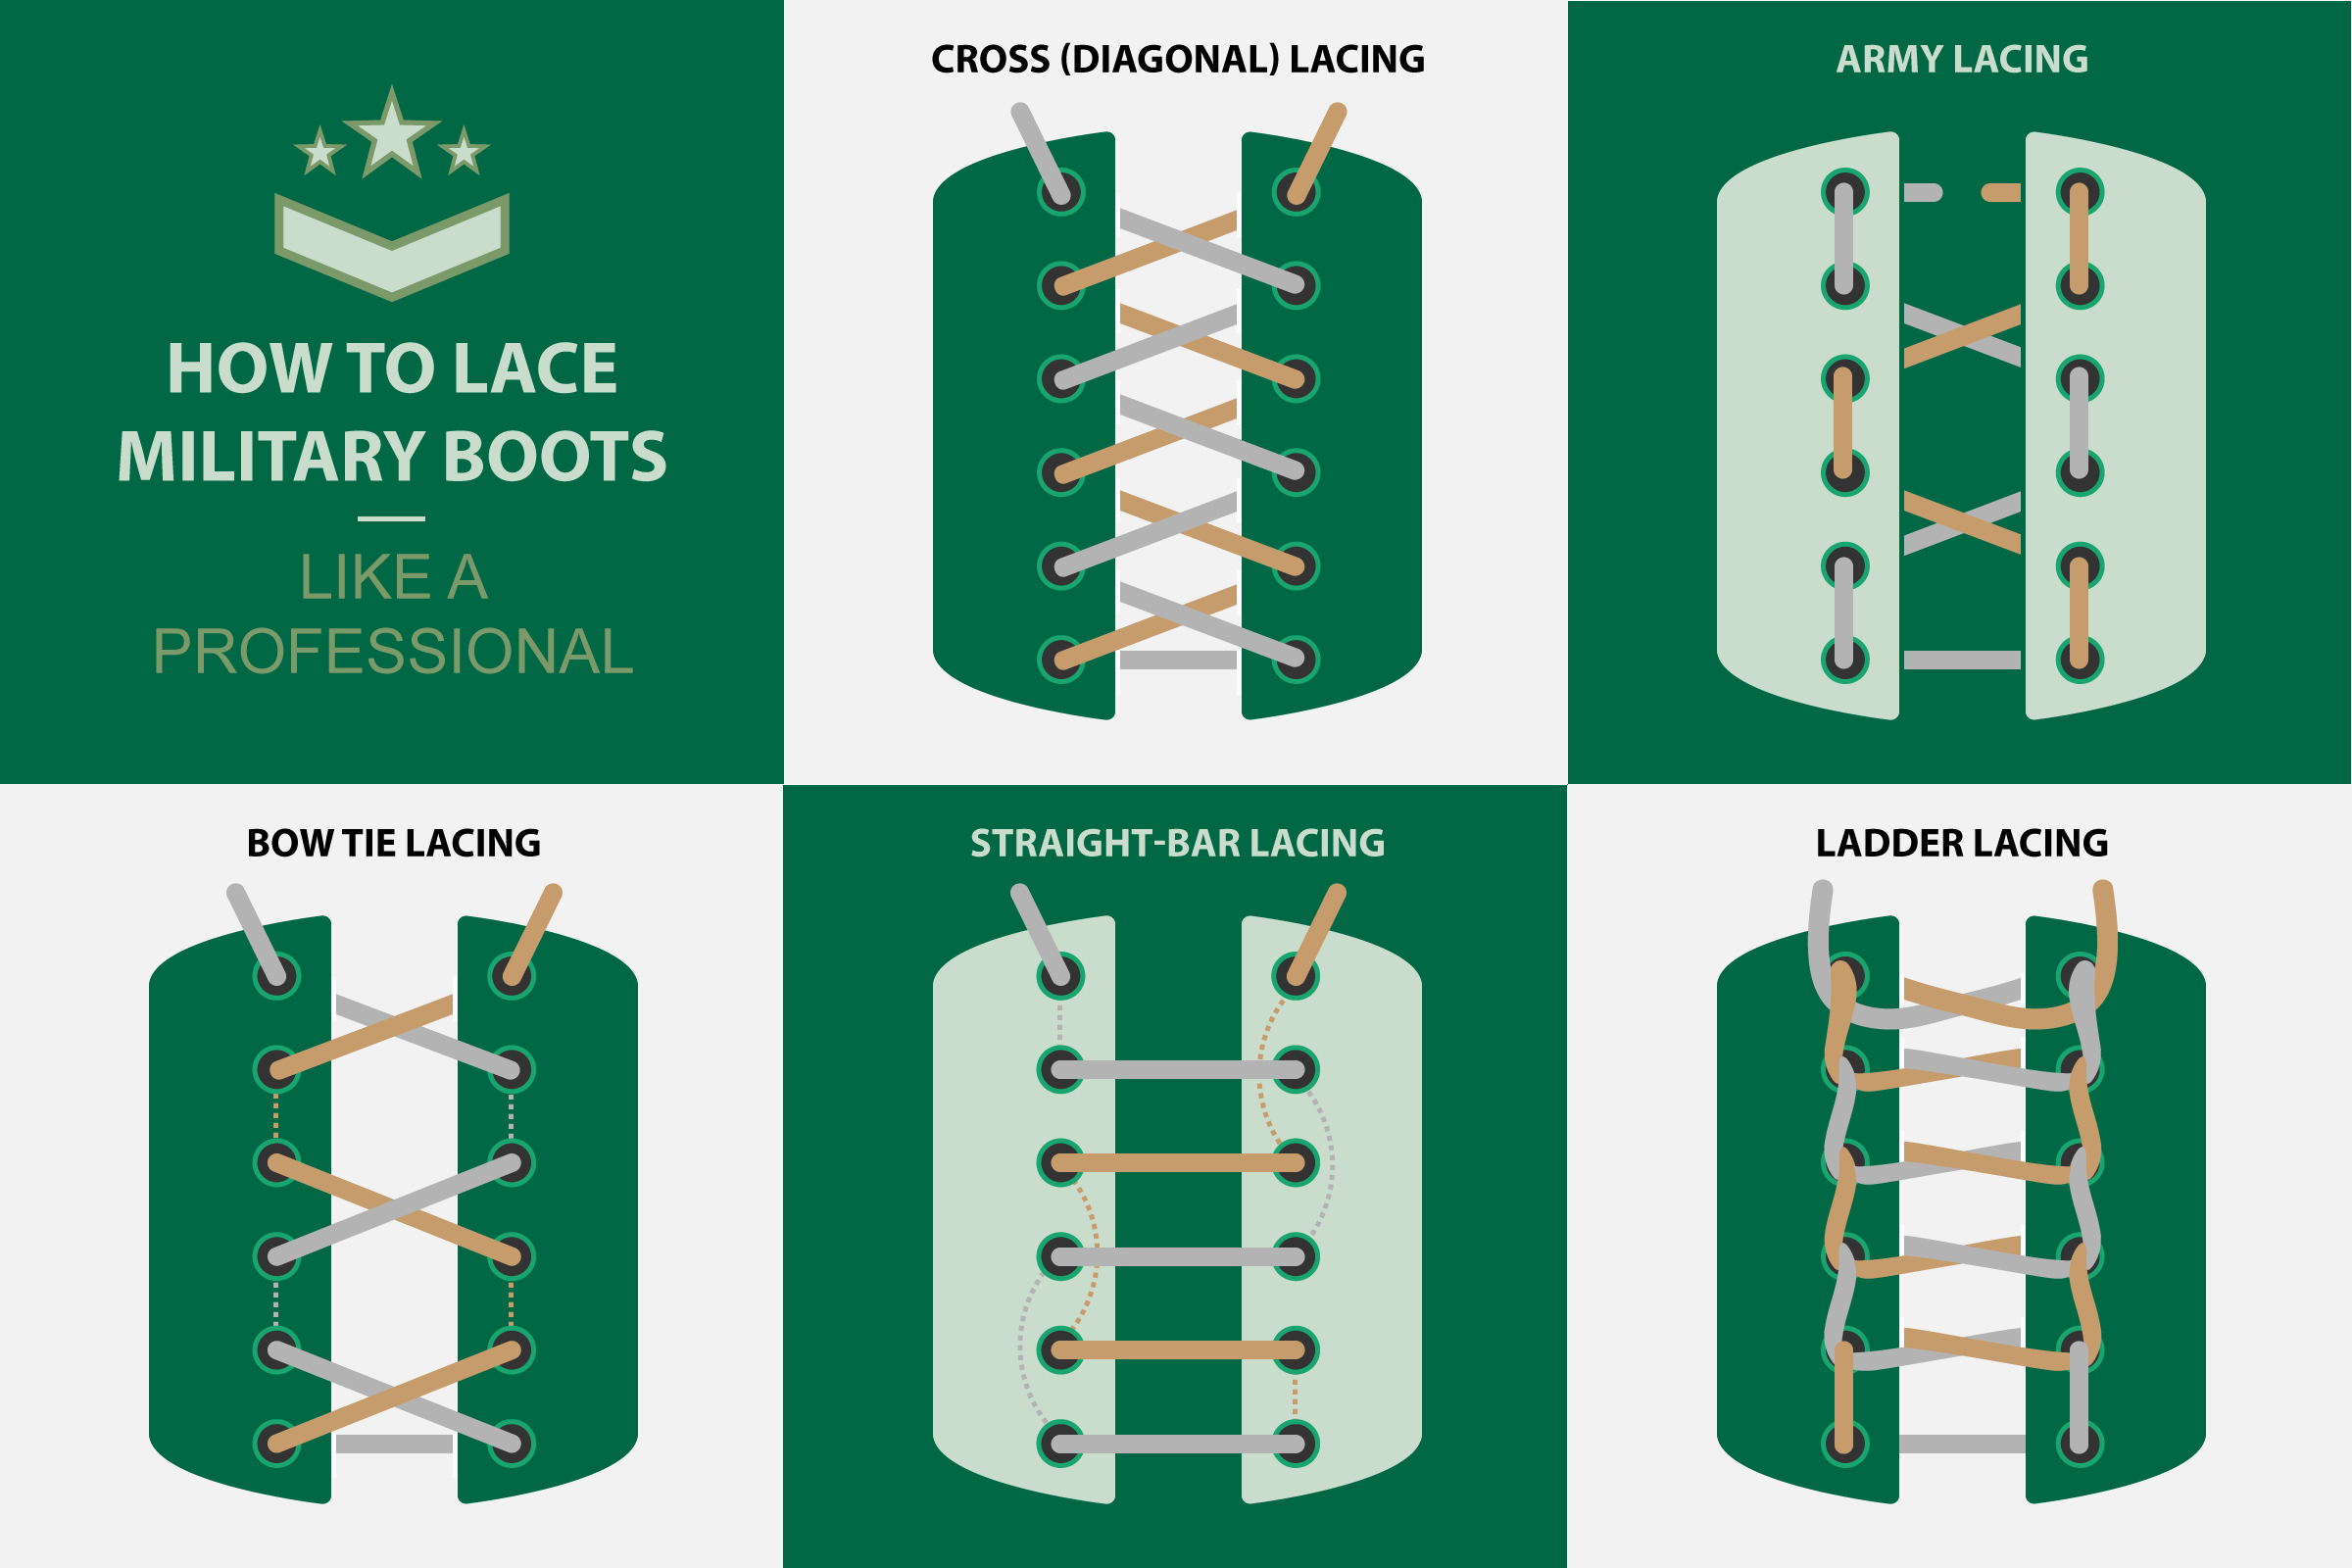
Now that the shoelaces are out of the way, let’s get down to business. The most popular method of lacing military or high quality tactical boots is called the ladder lace. As we’ve pointed out, you’ll need a longer pair of shoelaces before you try this.

Start with the eyelets at the bottom of the boot, closest to the toes. Run the shoelaces through the inside of that bottom row, so that the ends of the shoelaces come out upwards. Make sure there’s an equal amount of lace on each side.
Now that the lace is outside. pull the end of each lace to the next free vertical eyelet above it, and push in each end. Cross each end of the lace to the other side, but don’t pull the lace outside yet. Before you pull it out, you’ll want to thread each side of the lace around the vertical section you created in the previous step. Make it as taught as you can, and then go upward through the next eyelet. It should be clear now why you needed longer shoelaces for this method.
Keep going until you’ve threaded the lace through all of the eyelets. Once you’re out of eyelets, you can tie the knot inside of the boot. For some extra tightening, you could thread the laces one last time through the last opposite vertical section you made.
Depending on how much lace you have left from the lacing process, double or triple the knot to ensure it stays tied. As you can see, the end result really does resemble a ladder, which is where this technique gets its name from. Now you know how to lace military boots.
There are very few techniques that offer as much stability and support as the ladder lace does.
Which Other Methods Are Also Good?
We showed you the most popular method, so now we’ll now toss in a couple of others that are quite practical and good to know.
Cross (Diagonal) Lacing
Criss-cross lacing, or just cross lacing, is also a nice addition to anyone who wants to learn how to lace boots military style. You can also call it over-under lacing due to how this diagonal method works.

Criss-cross lacing is all about feeding the lace from the inside towards the outside, again and again. You start going from inside out at the bottommost pair of eyelets, pull the lace upwards, and then measure to make sure the two sides are even. You criss-cross the laces, making sure that the cross is on the inside since you’ll be doing the same routine once you get to the next pair of eyelets — thread the lace from the inside out.
The laces are always crossing, which means once you make the initial horizontal line, each lace will be diagonal until the end.
Army Lacing
So, how to lace boots military style?

Army lacing is quite similar to the ladder lacing method we described above. If you wanted to go full military-style, you could grab a pair of military boots and lace them like they do in the army. Just like when you learned how to lace military boots using ladder lace, you’ll want to keep the crosses on the inside and verticals on the outside. This prevents snagging and keeps your shoelaces safe.
However, army lacing is not nearly as supportive as ladder lace for example. There are many other techniques that are straight-up better for support and stability.
Bow Tie Lacing
If you know how to do army lacing, you basically know how to lace military boots using bow tie lacing as well.

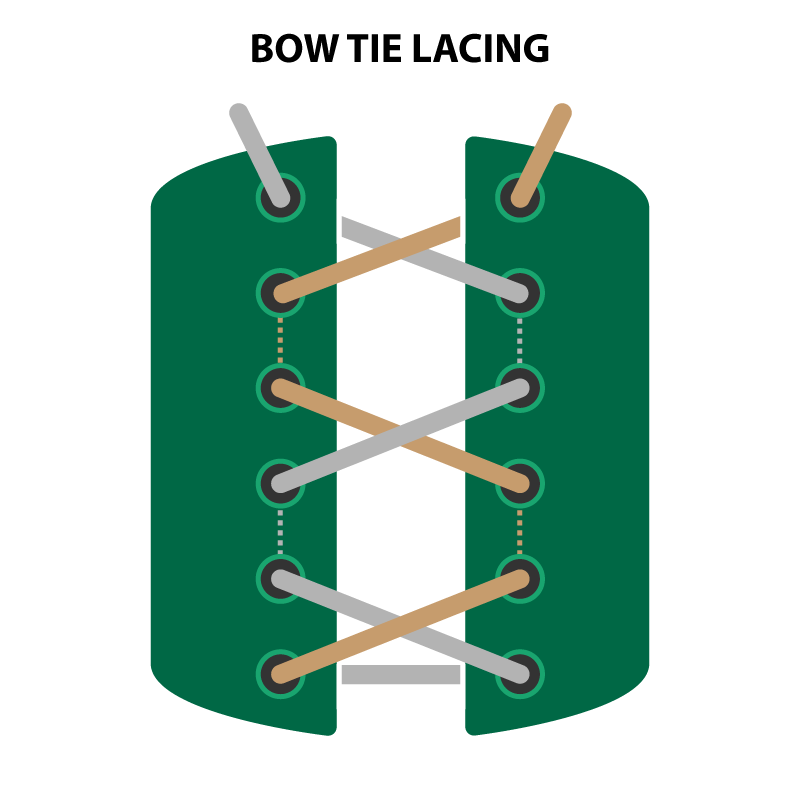
Bow tie lacing is the opposite of army lacing. You also start inwards and go outwards on the first horizontal thread. After that, however, you don’t do the cross on the inside like in the army, you do it on the outside. Once you reach the opposite eyelet, push the lace through it, and then reach the next vertical eyelet from the inside. Pull the lace out, and then do the cross on the outside again.
Straight-Bar Lacing

Unlike all the others before it, straight-bar lacing starts on the outside. Thread inwards through the first eyelet. As always, make sure that both sides are of equal length.
Once both sides of the lace are on the inside, pull one end through the first available vertical eyelet, and the other end through the second available vertical eyelet, basically skipping the first available eyelet. Remember, you’re going vertically, no crossing with this method.
Once you pull both ends outside, do a vertical line, and push the lace inside again. This time alternate the skip: the lace that jumped eyelet last time goes through the first available vertical eyelet this time. The other lace, the one that didn’t have to skip, does so this time and skips the first available eyelet. Repeat the process until there’s no more lace, and keep in mind that there shouldn’t be any crosses if you use this technique.


Practice Makes Perfect
Now you know how to lace military boots in several useful ways. As always, practice makes perfect, so keep trying as many different techniques as you can.
All of the methods above vary in how supportive and comfortable they are. That’s why you need to find the one that best supports your feet and ankles. As for the boots themselves, you have nothing to worry about — you’ll be wearing the toughest, manliest boots in existence.

